You've made a great AI video, but without audio, your content feels flat. While many creators spend hours refining visual prompts and editing footage, they often forget that humans engage with stories through multiple senses.
The most critical element of your audio strategy is the voiceover. A strong voiceover carries the weight of your narrative, provides crucial information, and guides the viewer's emotional response. Sound effects and background music are excellent tools, but they exist primarily to support the spoken word.
This tutorial will show you exactly how to plan, generate, and integrate professional AI voiceovers into your videos, using popular AI platforms to streamline your workflow.
Step 1: Plan Your Voiceover Script
You have to have a plan before you generate a single word. Tacking on a voiceover randomly will cause your video to sound amateurish and disjointed.
- Write a Dedicated Script: Don't try to ad-lib or use a generic summary. Even for a short video, write down precisely what the AI voice will say. This dictates the pacing of your entire video.
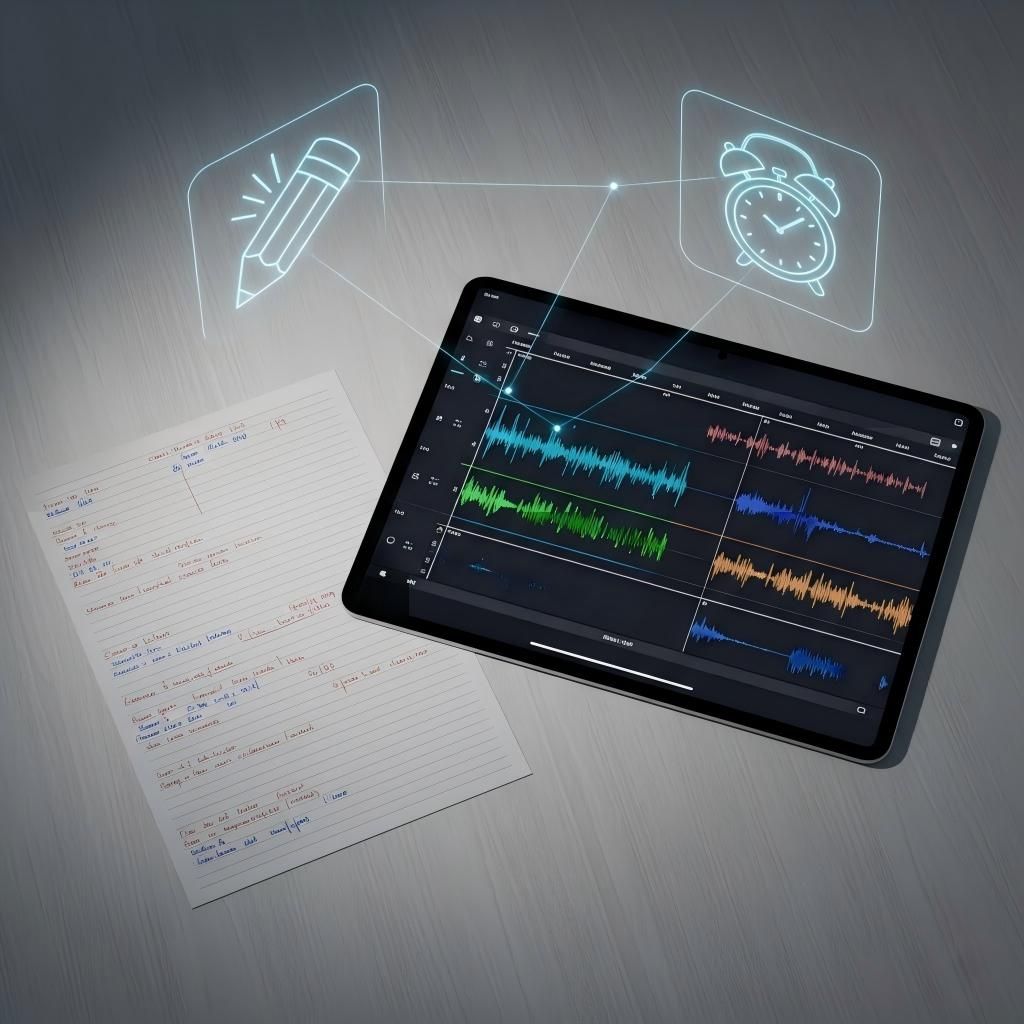
- Map the Timeline: Watch your silent AI video and note down exact timestamps. Indicate where the voiceover should begin, where natural pauses should occur, and where it should end.
- Consider Your Audience: An educational tutorial requires clear, measured narration, while a marketing video might need an energetic, persuasive tone. Define the "character" of your voiceover before selecting a voice model.
Step 2: Generate the AI Voiceover
Producing your AI voiceover is easier than you may imagine. Today, creators generally choose between two main workflows: traditional Text-to-Speech (TTS) generation or integrated video-audio generation.
Method A: Integrated Generation (The "One-Shot" Method)
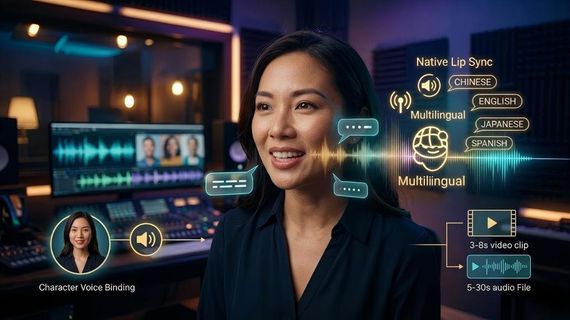
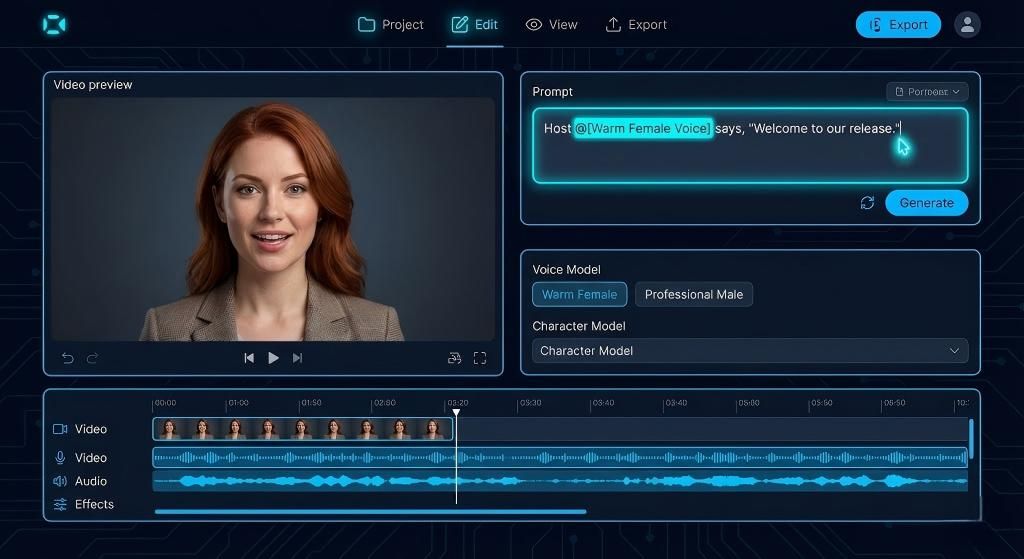
Modern AI video platforms increasingly offer tools that generate the video and the voiceover simultaneously, ensuring perfect lip-sync from the start. For example, using Kling AI's Video 2.6 model, you can drive the voiceover directly within your video prompt using specific syntax.
By typing a prompt like Host @ says, "welcome to today's release," the platform generates the visual mouth movements and the audio phonemes at the exact same time. This is highly efficient for dialogue-heavy scenes.
Method B: Using Dedicated Lip Sync Tools
If you have already generated a silent video of a character and have a separate audio file (or a script), you can merge them using a Lip Sync tool. Tools like Kling AI's Lip Sync module allow you to upload a 60-second 720p video clip alongside your text or audio file. The AI then maps your generated voiceover to the character's face, animating the mouth to match the spoken words without manual keyframing.
Method C: Standalone Text-to-Speech (TTS)
If your video does not feature a speaking character (e.g., a landscape montage with a narrator), you can use any standalone AI voice generator.
- Upload your script and select a voice that matches your brand's tone.
- Divide long paragraphs into shorter segments to maintain natural pacing.
- Modify the speed slightly (slower speech often sounds more natural) and generate your audio files.
Step 3: Enhance the Voiceover with Sound Effects
Once your voiceover is locked in, you can use sound effects and ambient noise to build a world around the speaker. The key here is subtlety; sound effects should never overpower the narration.
- Establish Atmosphere: Begin with ambient sounds (like gentle wind or distant office chatter) to give your voiceover a physical location.
- Action Sounds: Add subtle Foley (footsteps, coffee cups clinking) to match on-screen actions.
- AI Audio Generation: Instead of searching stock libraries, you can use AI to generate exact matches. For instance, platforms like Kling AI offer Video-to-Audio tools that analyze the movement in your video and automatically generate corresponding ambient layers. Alternatively, Text-to-Audio tools allow you to prompt specific background music or localized sound effects (like "galloping hooves").
Step 4: Mix and Sync for Professional Results
Properly mixing your voiceover with your supporting audio distinguishes professional productions from amateur content.
- Import to an Editor: Bring your generated video, your voiceover track, and your sound effects into an editing program like Premiere Pro, DaVinci Resolve, or CapCut.
- Make the Voiceover Priority: Your viewer must be able to hear the words effortlessly. If they are struggling to decipher the voice, they will scroll past.
- Apply Audio Ducking: Use your editor's "ducking" feature to automatically reduce the volume of your background music and sound effects whenever the voiceover is speaking.
- Balance the Mix: As a general rule, background noise and music should sit at around 20-30% of your voiceover's volume level.
- Visual Syncing: If you are manually syncing a voiceover to a character's lips (and not using an AI Lip Sync tool), use the visual waveforms in your audio track to align the peaks of the spoken words with the opening of the character's mouth on screen.
Common Voiceover Mistakes to Avoid
Even veteran creators commit these blunders. Understanding what not to do will save you time and enhance your output.
- Robotic Pacing: If your AI voice sounds too mechanical, add punctuation (commas, ellipses) to force the AI to take natural breaths between sentences.
- Out-of-Sync Audio: If lips don't sync with the words, the illusion breaks instantly. Always double-check your alignment before exporting.
- Audio Clutter: Too many dramatic sound effects will drown out your narrator. Pick your moments carefully and allow the voiceover room to breathe.
Your Next Steps in AI Video Production
You now have a complete roadmap for adding professional-sounding AI voiceovers to your videos.
Begin your next project by focusing heavily on your script. Experiment with different generation methods, whether that is using an all-in-one integrated tool, a dedicated Lip Sync module, or traditional TTS and manual mixing. Start with the voiceover as your foundation, layer your sound effects carefully, and focus on clean audio mixing. Your viewers will notice the difference right away, and your message will finally be heard clearly.
Exampel 1 | Example 2 |
|---|---|
 |  |
Frequently Asked Questions
Q1. Why Is My AI Voiceover Choppy Between Sentences?
Choppy AI voiceovers are typically caused by generating a massive script in a single go without proper punctuation. Record your voiceover in small, paragraph-length pieces. Insert commas or period marks to force brief pauses between sentences, which allows the AI to mimic natural human breathing patterns.
Q2. How Do I Fix Bad Lip Sync in My AI Video?
If your audio and video are out of sync, you have two options. First, you can manually nudge the audio track frame-by-frame in your video editor until the waveforms match the visual mouth movements. Alternatively, you can run your base video and final audio track through a dedicated AI Lip Sync tool to automatically re-animate the mouth to match the audio perfectly.
Q3. Which Audio Format Should I Export for Optimal Quality?
Export your completed audio at 48 kHz, 24-bit WAV format for optimal quality retention through video editing. If file sizes become an issue, a 320 kbps MP3 offers great quality with lower file sizes. Both formats are well-supported by modern video editors.